Starting with the iPhone 15 series (and continuing with the iPhone 16), Apple replaced with venerable Lightning port with a USB-C port. In addition to continue using the same class of accessories that were supported with Lighting, on the Pro models Apple also added support for connecting a USB-C memory drive and shooting ProRes video directly onto it, a feature useful for these large files that quickly eat up storage space on the phone, and enhancing pro workflows like copying the video onto a computer for editing.
REC also supports this feature, and in addition to Apples support for recording ProRes, REC also allows you to record any video format such as h.264 or HEVC directly from your iPhone to an external storage device!
How to shoot to a USB-C drive
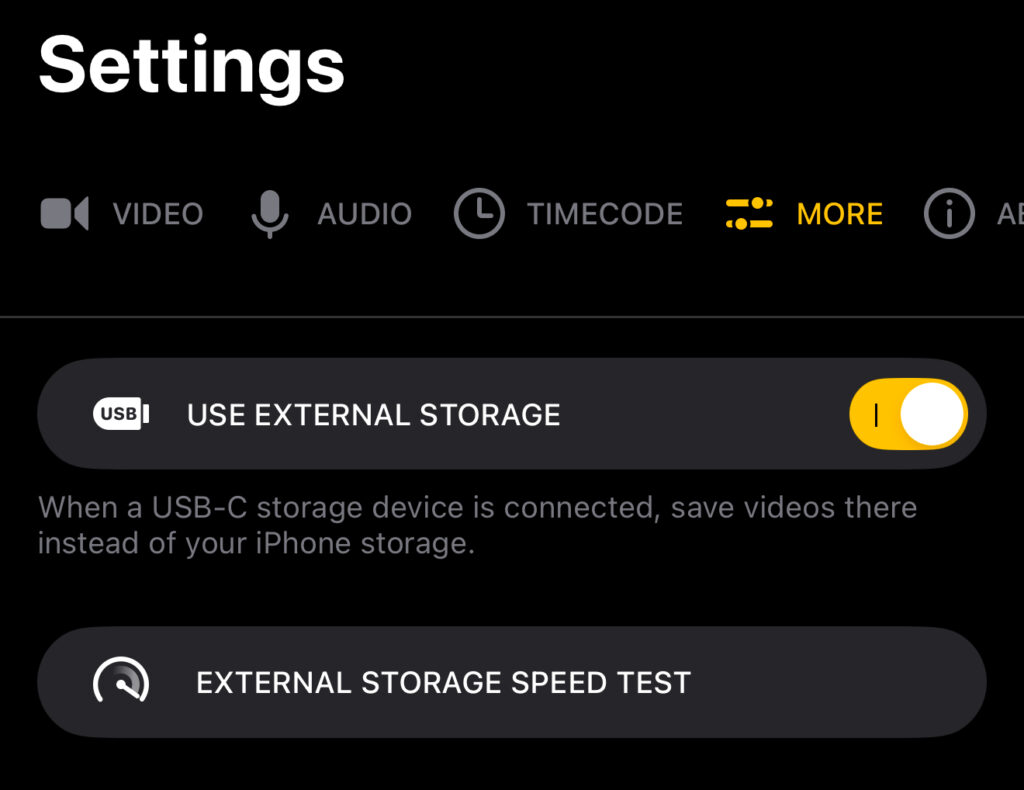
Press the Settings button, and select the More tab. Scroll down to find the Use External Storage option and turn it on. iOS will ask for permission to access Files.
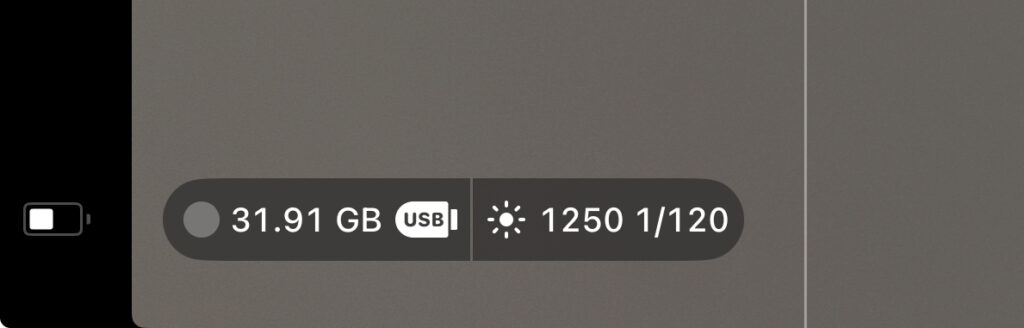
Once the setting has been turned on and permissions granted, once you plug in a compatible USB-C drive, a USB icon will appear in the bottom left of the viewfinder, next to the available storage indicator.
Preparing a USB-C drive for use with the iPhone
Requirements
There are a couple requirements to be able to use a USB-C drive to shoot video.
First of all, the drive has to be in the right format. Second of all, it has to be fast enough to record video in real-time. REC has built-in tools to help you with all this.
Checking the disk format
Press the Settings button, and select the More tab. Scroll down to find the “External Storage Speed Test” button and tap it. Now insert your USB-C drive and wait a few seconds.
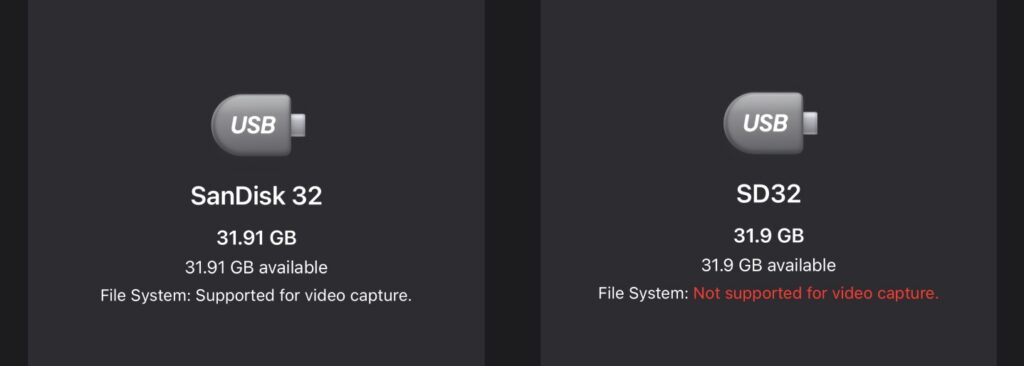
If the resulting screen shows File System: Supported for video capture, you’re ready to check if the disk is fast enough.
If it says “Not supported for video capture”, you need to reformat the disk into the right format. Beware that this will erase everything on the disk, so make sure to back up any files you have on this disk before erasing it.
Re-formatting the disk
To re-format the disk, leave REC and open the “Files” app that Apple installs by default on the iPhone. Your USB-C disk should be shown in the list of Locations.
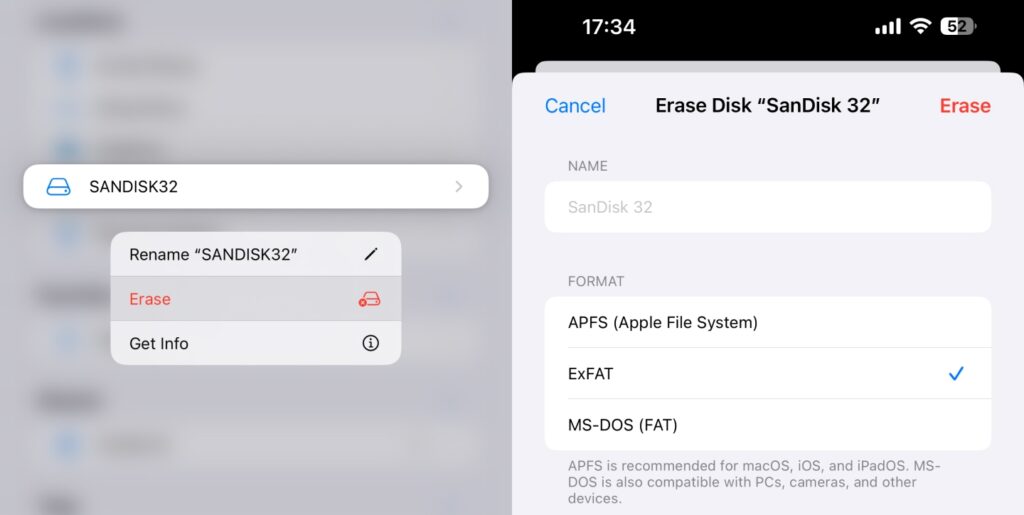
Tap and hold your finger on it (long-press), and in the menu that pops up, select Erase. In the sheet that pops up, make sure to select the ExFAT format (the iPhone can not record video to any other format), and press Erase.
Checking the speed
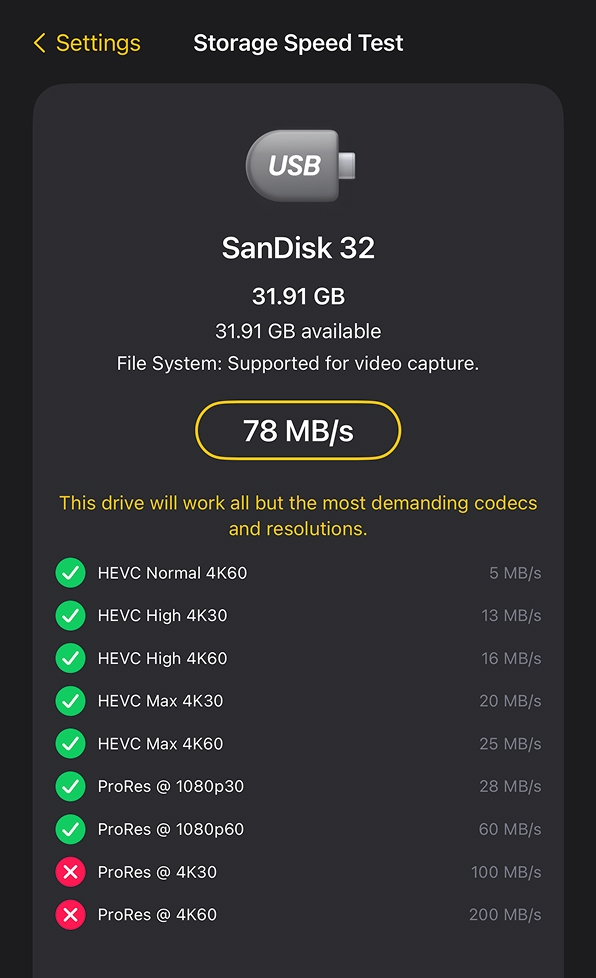
Once you have a USB-C stick in the right format, you can check if it’s fast enough to record video.
Press the Settings button, and select the More tab. Scroll down to find the “External Storage Speed Test” button and tap it. Now insert your USB-C drive and wait a few seconds. Once the drive appears, press the “Start” button, and REC will start testing the drive. Do not leave REC or unplug the drive while this is in progress.
Once the test is complete, REC will show a list of video formats and whether your disk is fast enough to record them or not.